The Best Easy No-Bake Peanut Butter Crunch Cups
Easy healthy peanut butter crunch cups made with dark chocolate, creamy peanut butter, crispy cereal, and maple syrup. A simple no-bake dessert.
📋 Table of Contents
Why You’ll Love This Recipe
These easy healthy peanut butter crunch cups are the kind of no-bake dessert that feels rich without being fussy. The dark chocolate gives a firm, glossy shell with a deep cocoa aroma, while the peanut butter filling stays creamy, nutty, and lightly sweet from maple syrup. The crispy rice cereal is what makes the cups memorable: it adds a delicate crackle through the center so each bite has contrast instead of tasting like plain chocolate and peanut butter.
When testing these cups, the best batch came from keeping the layers fairly thin. A heavy chocolate base can turn too hard in the refrigerator, making the cups difficult to bite cleanly. A thinner base sets quickly, snaps gently, and lets the peanut butter crunch layer stay the focus. Natural peanut butter works especially well because its looser texture coats the cereal without crushing it, giving the filling a softer, chewy-crisp bite.
One mistake that can happen is adding the crispy cereal while the peanut butter mixture is too stiff or cold. The cereal breaks as you stir, and the filling becomes dense instead of light and crunchy. To fix it, warm the peanut butter and maple syrup just slightly until they stir easily, then fold in the cereal with a spatula. The goal is to coat the cereal, not smash it. That small handling detail makes the center taste fresher and keeps the texture crisp.
A pinch of sea salt on top is more than decoration. Salt sharpens the dark chocolate, balances the maple sweetness, and makes the peanut butter taste fuller. After an hour in the refrigerator, the cups set into a firm but creamy treat: cool chocolate on the outside, nutty crunch inside, and a clean finish that is sweet, salty, and satisfying. They are useful for snack prep, lunchbox treats, or a small dessert when you want something homemade with simple pantry ingredients.
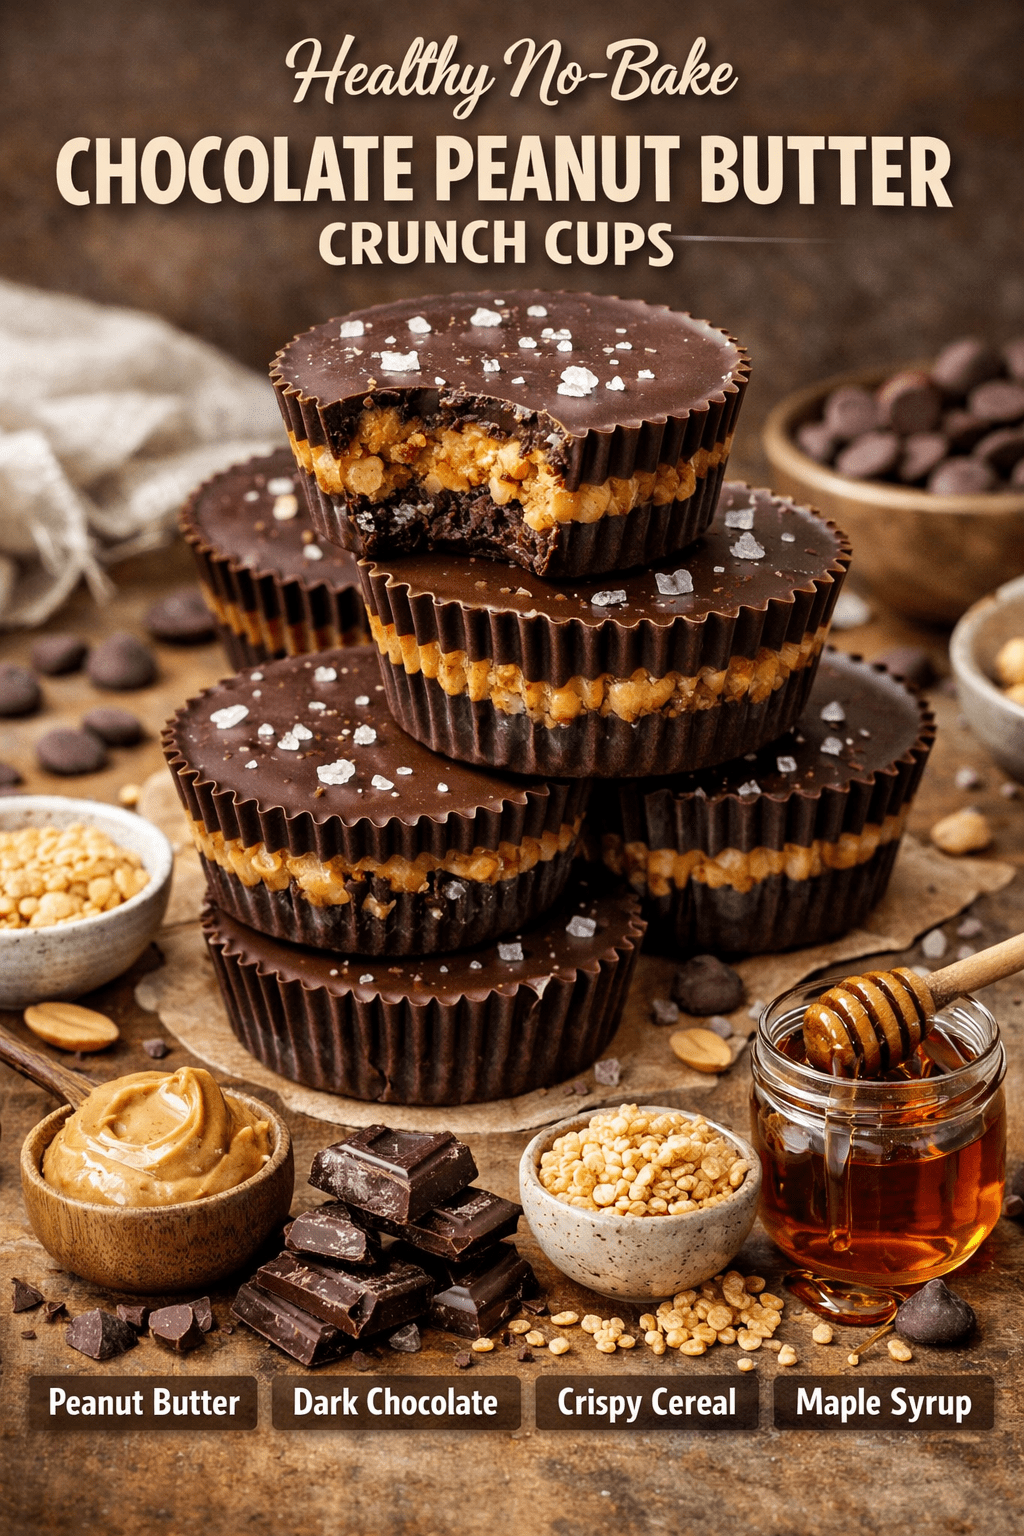
Easy Healthy Peanut Butter Crunch Cups (No-Bake)
Ingredients
Equipment
Method
- Line a muffin tin with cupcake liners and set aside.
- Melt the dark chocolate using a microwave or double boiler until smooth.
- Spoon a small amount of melted chocolate into each liner and spread to form the base layer.
- Place the muffin tin in the refrigerator for 10 minutes to set.
- In a bowl, mix peanut butter, maple syrup, and crispy cereal until well combined.
- Spoon the peanut butter mixture evenly over the chocolate base.
- Pour the remaining melted chocolate over the peanut butter layer, covering completely.
- Sprinkle with sea salt if desired.
- Refrigerate for at least 1 hour, or until fully set.
- Remove from the liners and enjoy.
Notes
- Use natural peanut butter for best texture.
- Store crunch cups in the refrigerator for up to 7 days.
- Freeze for 30 minutes if you want them to set faster.
- Sprinkle sea salt on top for extra flavor.
- These no-bake cups are perfect for meal prep snacks.
Where This One Goes Wrong
Melt the dark chocolate gently. In the microwave, use short bursts and stir between each one, stopping while a few small pieces remain; the residual heat will finish the melting. This prevents scorching, which can make chocolate smell bitter and turn thick or grainy. A double boiler also works well, but keep water and steam away from the bowl because even a small splash can make chocolate seize.
Use cupcake liners so the cups release cleanly. Paper liners work, but silicone liners give the smoothest sides and make it easier to peel away the chocolate without cracking it. When forming the base layer, use the back of a spoon to spread the chocolate slightly up the sides. This creates a shallow shell that holds the peanut butter filling in place.
Natural peanut butter can separate in the jar, so stir it well before measuring. If it is too runny, chill the mixed filling for 5 minutes before spooning it into the cups. If it is too thick, warm it briefly with the maple syrup until glossy and loose. The filling should be scoopable, not stiff.
For the best crunch, fold the cereal in last and avoid pressing the mixture too firmly into the liners. A compact filling sets harder and loses its airy texture. Store the finished peanut butter crunch cups in the refrigerator for up to 7 days, or freeze them for longer storage. Let frozen cups sit at room temperature for 5 to 8 minutes before eating so the chocolate softens slightly and the peanut butter flavor opens up.
Serving Variations
For a dairy-free version, choose a dark chocolate that does not contain milk ingredients and use natural peanut butter made only with peanuts and salt. For a gluten-free version, use certified gluten-free crispy rice cereal, since not all rice cereals are processed in gluten-free facilities.
Almond butter or cashew butter can replace peanut butter, though the flavor and texture will change. Almond butter gives a toastier, slightly drier filling, while cashew butter tastes milder and creamier. If using a thicker nut butter, add a small extra drizzle of maple syrup or warm it briefly before mixing so the cereal stays intact.
For more texture, stir in chopped roasted peanuts, cacao nibs, or shredded coconut with the cereal. Keep add-ins modest so the filling still holds together. A touch of cinnamon gives the cups a warmer snack-bar flavor, while flaky sea salt on top makes the dark chocolate taste deeper and less sweet.
You can also make mini peanut butter crunch cups in a mini muffin tin. They set faster, portion neatly, and work well for meal prep snacks. Reduce the chilling time slightly, but keep them refrigerated until firm so the chocolate shell releases cleanly from the liners.
Bases, Chilling, and Clean Slices
A no-bake dessert is held together by cold and by the ratio in its base. Both are easy to get slightly wrong, and both show up at the moment you cut it.
Start with the base. For a pressed crumb crust, the working ratio is roughly one part melted butter to three or four parts crumbs by weight. Too little butter and it collapses into rubble when sliced. Too much and it sets hard and greasy in the fridge, closer to a toffee than a crust. Press it down firmly with the flat base of a glass rather than your fingers, which compacts it evenly and stops the edges from crumbling first.
Then chill properly. Four hours is a minimum and overnight is genuinely better. Firmness keeps developing for hours after the surface feels set, and most disappointing slices are simply cut too early.
For cutting, heat is the tool. Dip a thin knife in hot water, wipe it dry, and make one clean pass straight down. Wipe it again between every cut. Do not saw back and forth, which drags the layers into each other. If a layer is very firm, letting the whole thing sit at room temperature for ten minutes first gives a cleaner edge than fighting it cold.
One preparation step saves all of this: line the tin with a parchment overhang or a strip of acetate before you start. Lifting the whole dessert out and cutting it on a board beats digging the first slice out of a tin every time.
Frequently Asked Questions
- Q: Can I make these peanut butter crunch cups ahead of time? Yes. They hold well in the refrigerator for up to 7 days when stored in an airtight container. Add sea salt before the chocolate fully sets so it sticks to the top.
- Q: Why did my chocolate turn thick or grainy? The chocolate may have overheated or come into contact with water. Melt it slowly, stir often, and keep bowls and utensils completely dry.
- Q: Can I freeze these no-bake cups? Yes. Freeze them in a sealed container, separating layers with parchment. Let them soften for a few minutes before eating so the chocolate is not too hard.
- Q: What cereal works best for the crunch layer? Crispy rice cereal gives the lightest texture. Choose a fresh box, because stale cereal loses its snap quickly once mixed with peanut butter.
- Q: Can I make them less sweet? Use a darker chocolate and reduce the maple syrup slightly. Avoid removing all the syrup because it helps bind the peanut butter and cereal together.