The Best Easy M&M Chocolate Chip Cookie Bars
Soft and chewy M&M chocolate chip cookie bars loaded with gooey chocolate and colorful candies. This easy one-pan dessert recipe is perfect for parties, kids, and quick homemade treats.
📋 Table of Contents
Why You’ll Love This Recipe
These M&M chocolate chip cookie bars have the same buttery depth and chewy center you expect from a bakery cookie, but without the hassle of scooping individual dough balls. Everything bakes in one pan, creating thick bars with crisp golden edges and a soft middle packed with melted chocolate pockets and crunchy candy shells. The aroma alone — warm vanilla, brown sugar, and toasted butter — fills the kitchen within the first 15 minutes of baking.
One detail that makes these bars stand out is the melted butter technique. Instead of creaming softened butter, the melted butter blends more thoroughly with the sugars, giving the bars a denser, fudgier chew. During testing, we noticed the texture became noticeably softer the next day, almost like a cross between a blondie and a chocolate chip cookie. The brown sugar also helps retain moisture, which is why the bars stay tender even after storing.
A common mistake with cookie bars is overbaking them until the center looks fully set. That usually leads to dry, cakey squares once cooled. The center should still look slightly underdone when removed from the oven. Residual heat continues cooking the middle as the pan cools, creating that rich gooey texture. If the top browns too quickly before the center is ready, loosely tent the pan with foil during the final 8 minutes of baking.
The extra M&Ms pressed onto the surface before baking are not only decorative — they create little crunchy bursts that contrast beautifully against the soft crumb. For the best flavor balance, a tiny pinch of flaky sea salt on top right after baking cuts through the sweetness and intensifies the chocolate flavor. It is a small bakery-style trick that makes a noticeable difference.
These bars are especially practical for parties, bake sales, and holiday trays because they slice cleanly once cooled. If you try cutting them too early, the warm chocolate can cause the bars to collapse or stick to the knife. Letting the pan cool fully on a rack gives the butter and chocolate time to settle, which creates neater squares with chewy centers and crisp corners.
Whether served slightly warm with vanilla ice cream or packed into lunch boxes the next day, these cookie bars deliver layers of texture in every bite — buttery dough, melted chocolate chips, and crunchy candy-coated chocolate scattered throughout.
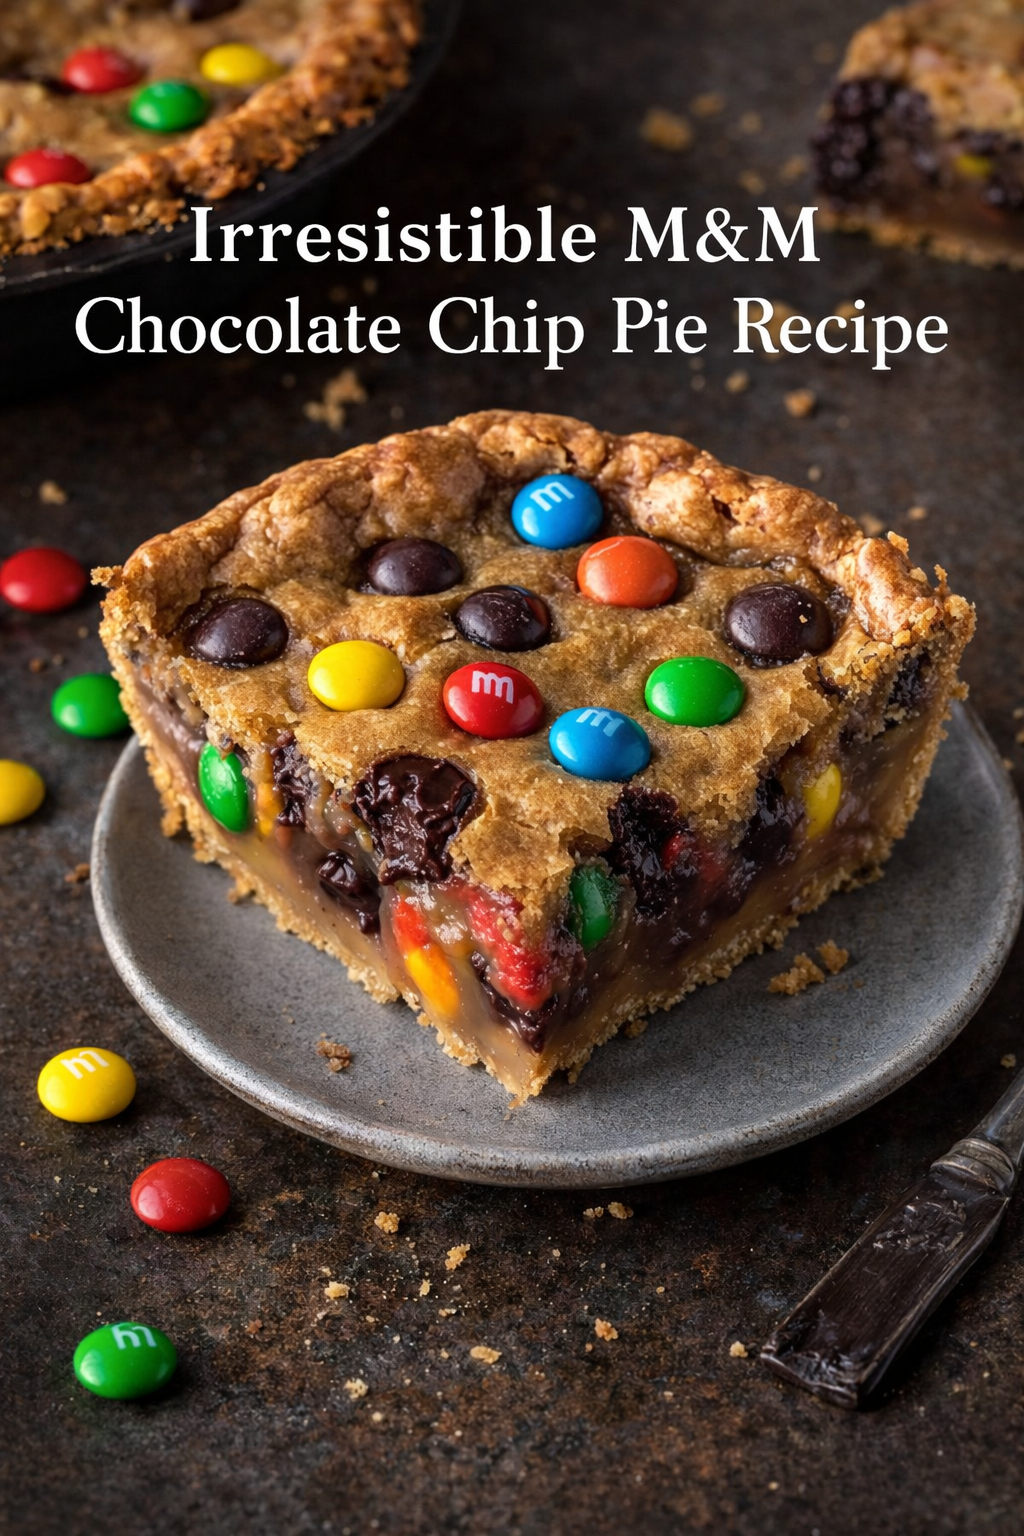
M&M Chocolate Chip Cookie Bars
Ingredients
Equipment
Method
- Prep
- Preheat oven to 350°F (175°C)
- Line a 9×13-inch baking pan with parchment paper
- Mix Dry Ingredients
- In a bowl, whisk together:
- Flour
- Baking soda
- Salt
- Mix Wet Ingredients
- In another bowl:
- Combine melted butter + sugars
- Whisk until smooth
- Add eggs + vanilla
- Mix until creamy
- Combine
- Gradually add dry ingredients into wet
- Mix until just combined (don’t overmix)
- Add Chocolate & M&Ms
- Fold in:
- Chocolate chips
- M&Ms
- Transfer to Pan
- Spread batter evenly into pan
- Sprinkle extra M&Ms on top
- Bake
- Bake for 25–30 minutes
- Edges should be golden
- Center slightly soft (it firms up while cooling)
- Cool & Slice
- Let cool completely (important!)
- Cut into squares or bars
Notes
Use room temperature eggs for better mixing
Add a pinch of flaky salt on top for a bakery-style finish
Chill dough 20 mins if you want thicker bars
Expert Tips & Techniques
For thick, chewy cookie bars with crisp edges, avoid aggressively mixing the batter once the flour is added. Overmixing develops excess gluten, which can turn the bars dense and tough instead of soft and tender. Stir only until the flour disappears, then immediately fold in the chocolate chips and M&Ms.
Using parchment paper with overhanging edges makes removal much easier and prevents broken corners when slicing. During recipe testing, we found metal baking pans produce slightly crispier edges than glass pans because they conduct heat more efficiently. If using glass, expect the bars to need an additional 3–5 minutes in the oven.
Another professional bakery trick is reserving a small handful of chocolate chips and candies to press onto the top before baking. This creates a more polished appearance and ensures visible chocolate throughout the surface once sliced. For deeper flavor, lightly toast the butter until it smells nutty before mixing it with the sugars. Brown butter introduces caramel notes that pair beautifully with milk chocolate candies.
If your bars turn out greasy, the butter was likely too hot when mixed with the eggs. Let melted butter cool for several minutes before combining. Hot butter can partially cook the eggs and affect the dough texture. If the dough feels unusually thin, chilling it for 20 minutes before baking helps control spreading and creates thicker bars.
Store cooled bars in an airtight container for up to 4 days at room temperature. To bring back the freshly baked texture, warm a square in the microwave for 8–10 seconds. The chocolate softens again and the center becomes rich and gooey without drying out.
Variations & Alternatives
These cookie bars adapt well to different flavors and dietary needs. For a darker chocolate profile, swap semi-sweet chocolate chunks for milk chocolate chips and add chopped toasted pecans or walnuts. Peanut butter lovers can replace half the chocolate chips with peanut butter chips for a salty-sweet contrast that works especially well with peanut M&Ms.
To create a festive version, use seasonal M&M colors for holidays, birthdays, or themed dessert trays. Around the holidays, adding crushed peppermint candies creates a refreshing crunch against the buttery dough.
For gluten-free cookie bars, use a reliable 1:1 gluten-free flour blend containing xanthan gum. The bars may bake slightly softer, so allowing extra cooling time helps them firm up before slicing. Vegan adaptations also work surprisingly well: substitute plant-based butter, dairy-free chocolate chips, and flax eggs. The texture becomes slightly softer but still chewy and rich.
If you enjoy bakery-style salted desserts, sprinkle flaky sea salt over the bars immediately after baking. The salt enhances the caramel flavor from the brown sugar and balances the sweetness without overpowering the chocolate.
Frequently Asked Questions
-
Q: Why are my cookie bars dry instead of chewy?
Overbaking is usually the cause. Remove the pan when the edges are golden but the center still looks slightly soft. The bars continue cooking as they cool in the pan. -
Q: Can I freeze these cookie bars?
Yes. Once fully cooled, wrap individual squares tightly and freeze for up to 2 months. Let them thaw at room temperature or warm briefly in the microwave before serving. -
Q: Can I make the dough ahead of time?
Absolutely. The dough can be refrigerated for up to 24 hours before baking. Chilled dough often produces thicker bars with deeper caramel flavor because the sugars have more time to hydrate. -
Q: Why did my M&Ms crack during baking?
Some cracking is normal because the candy shell expands in the oven. Pressing extra candies onto the surface halfway through baking can improve the final appearance if needed. -
Q: What is the best way to cut clean squares?
Let the bars cool completely before slicing and use a sharp knife wiped clean between cuts. Warm bars are much softer and can fall apart when cut too early.



nice <3