The Best Easy Chocolate-Dipped Ice Cream Sandwich Bars
Make these easy chocolate-dipped ice cream sandwich bars with vanilla ice cream, graham crackers, and a crisp chocolate shell
📋 Table of Contents
Why You’ll Love This Recipe
These chocolate-dipped ice cream sandwich bars were born out of what I can only call a “summer kitchen rescue.” During one early test batch, I rushed the process and tried dipping bars that weren’t frozen solid enough. The result was predictable: softened ice cream squeezing out the sides, graham crackers turning limp, and a chocolate shell that slid off instead of snapping cleanly. It was messy—but it taught me everything about temperature control in frozen desserts. Once you get the technique right, the experience completely changes. You bite through a thin, crisp chocolate coating that cracks audibly, followed by a cold, creamy vanilla center that melts slowly on the tongue. The graham crackers soften just slightly at the edges, giving a buttery, honeyed contrast that keeps each bite structured but not rigid. The aroma of melted chocolate mixed with vanilla ice cream is simple but nostalgic—like a childhood dessert upgraded with pastry precision. The key insight here is structure through freezing. By layering the graham crackers with softened ice cream and freezing the slab as a whole, you create a unified block that behaves almost like a pastry dough when cut. If the ice cream is too soft, the layers collapse; if too hard, it won’t spread evenly. I found that letting it sit for exactly 6–8 minutes at room temperature before spreading gives the ideal pliability. Another lesson came from the chocolate coating. My early batches seized because a drop of water from condensation fell into the melted chocolate. Adding coconut oil solved this—not just for smoothness, but because it lowers viscosity, allowing a thin, even shell that sets quickly against the frozen bar. What makes this dessert stand out is contrast: cold and creamy against crisp and snappy, sweet vanilla against slightly bitter chocolate, soft ice cream against structured crackers. It’s a simple method, but every step depends on temperature discipline—and once mastered, it becomes one of the most reliable frozen desserts for warm weather gatherings.
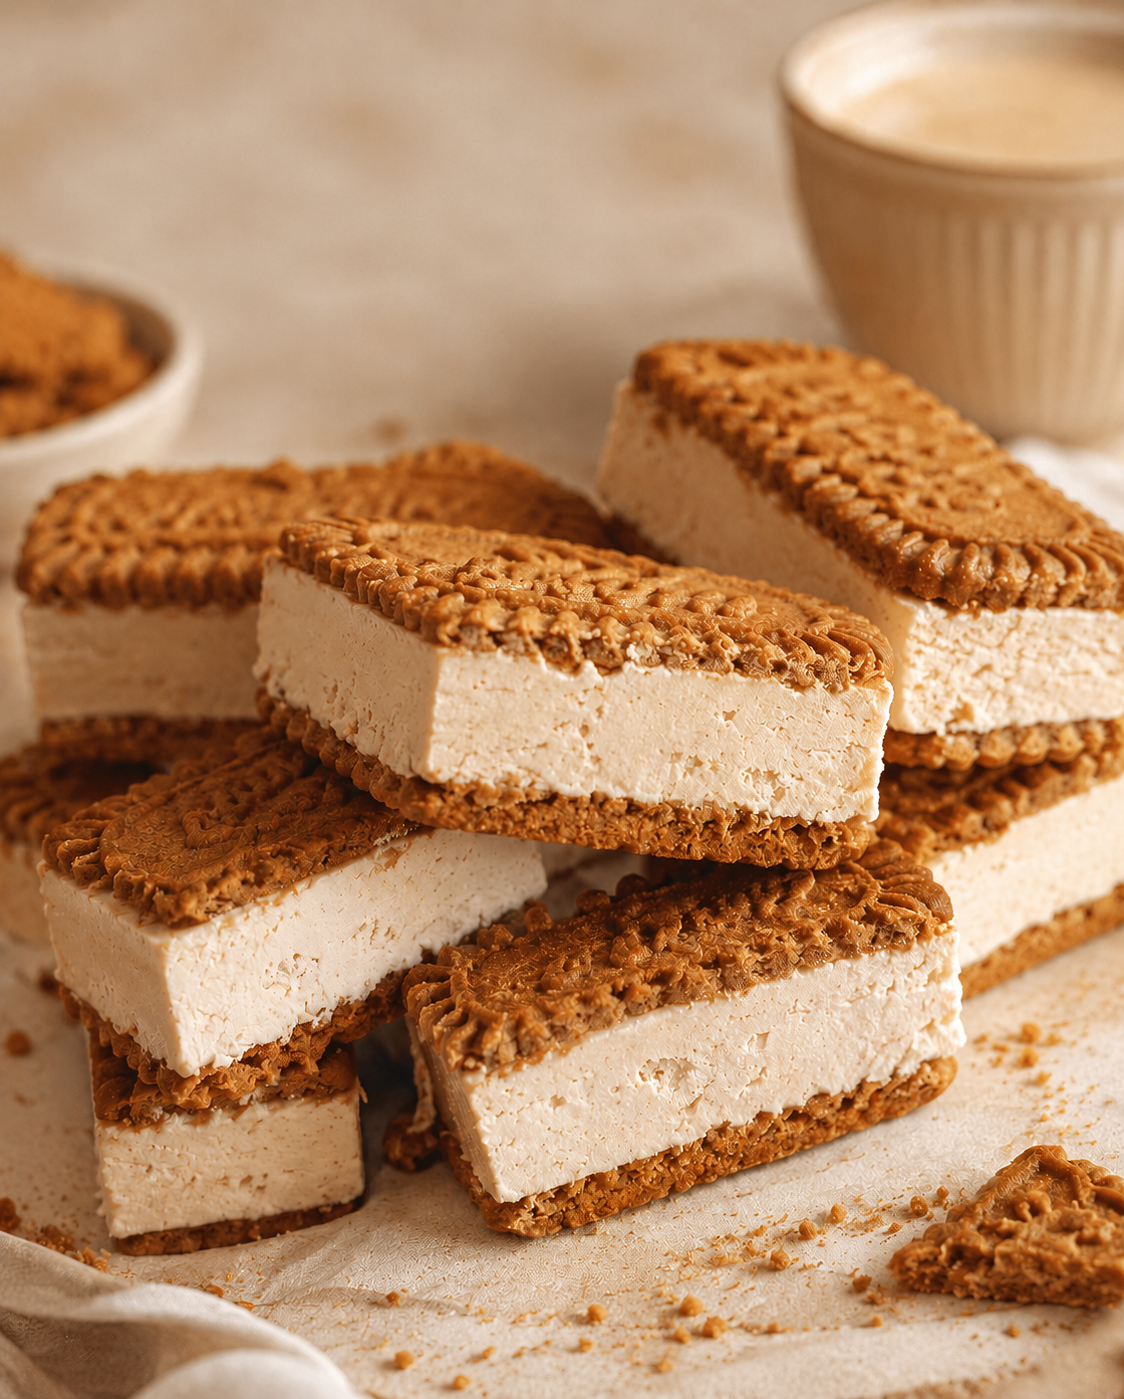
Chocolate-Dipped Ice Cream Sandwich Bars
Ingredients
Equipment
Method
- Step 1: Prepare the Pan
- Line a 9×13-inch baking dish with parchment paper, leaving some overhang on the sides for easy removal.
- Step 2: Create the Bottom Layer
- Arrange 12 graham cracker sheets in a single layer across the bottom of the pan. Break crackers as needed to fit.
- Step 3: Add Ice Cream
- Spread the softened vanilla ice cream evenly over the graham crackers. Smooth the surface using an offset spatula.
- Step 4: Add the Top Layer
- Place the remaining 12 graham cracker sheets over the ice cream, creating a sandwich layer.
- Step 5: Freeze
- Cover tightly with plastic wrap and freeze for at least 4 hours or until completely firm.
- Step 6: Cut into Bars
- Remove from the freezer and lift the dessert from the pan using the parchment paper. Cut into 12 rectangular bars.
- Step 7: Make Chocolate Coating
- In a microwave-safe bowl, combine chocolate chips and coconut oil. Heat in 30-second intervals, stirring between each, until smooth.
- Step 8: Dip the Bars
- Dip each frozen bar halfway into the melted chocolate. Allow excess chocolate to drip off.
- Step 9: Decorate
- Immediately sprinkle with crushed graham crackers, sprinkles, or mini chocolate chips if desired.
- Step 10: Freeze Again
- Place coated bars on a parchment-lined tray and freeze for 15–20 minutes until the chocolate is set.
Notes
- Work quickly when handling the bars to prevent melting.
- For cleaner cuts, warm the knife under hot water and wipe dry between cuts.
- Chocolate shell coating hardens faster if bars are very cold.
- Store in an airtight container in the freezer for up to 2 weeks.
Expert Tips & Techniques
Keep the bars as cold as possible during dipping—this is the difference between a clean chocolate shell and a streaky coating. I learned early on that even 2–3 minutes outside the freezer can cause the ice cream edges to soften just enough to slide during dipping. Work in small batches and return unused bars to the freezer immediately. One mistake I still see often is overheating chocolate. If it becomes too hot, it loses its glossy finish and turns dull after setting. Melt it gently in short bursts and stir continuously so residual heat finishes the job. Coconut oil is not optional here—it stabilizes texture and ensures a thin, snappy shell. For cleaner slicing, run your knife under hot water, dry it completely, then cut in a single motion. This prevents cracking and dragging through the ice cream layer. Store finished bars in a sealed container with parchment between layers to prevent freezer burn and sticking.
Variations & Alternatives
Swap vanilla ice cream for coffee, strawberry, or mint chip to shift the flavor profile dramatically. For a richer version, use dark chocolate coating instead of semi-sweet for a more pronounced cocoa bitterness against the sweetness of the ice cream. For a gluten-free adaptation, replace graham crackers with gluten-free digestive biscuits or almond-based cookies. A dairy-free version also works well using coconut milk ice cream and dairy-free chocolate chips, though freezing time may need to be extended slightly for firmer structure.
Frequently Asked Questions
- Q: Why is my chocolate coating cracking off? A: The bars may be too warm or the chocolate layer too thick; thin coating and colder bars fix this.
- Q: Can I make these ahead of time? A: Yes, they hold well for up to 2 weeks if tightly wrapped to prevent freezer burn.
- Q: Why are my graham crackers soggy? A: The ice cream was likely too soft during assembly; freeze immediately after layering.
")


