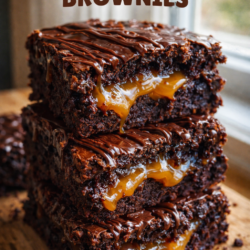
The Best Gooey Brownie Pie – Rich & Fudgy
Try this gooey brownie pie rich, fudgy, and loaded with chocolate flavor. Easy to make and perfect for dessert lovers, this brownie pie is crispy on the outside and soft in the center.
📋 Table of Contents
Why You’ll Love This Recipe
A brownie pie combines two things with opposite requirements. The pastry needs enough time and heat to cook through and stay crisp; the brownie filling is at its best pulled early and slightly underdone.
Blind-baking the shell first is what reconciles them. With the pastry already set and coloured, the filling can go in and bake only as long as it needs, rather than waiting for a raw crust to catch up.
For the filling, the ratio of egg to chocolate decides the texture. More egg gives a cakier, more set result; less gives the dense, fudgy interior that the name promises. Beating the eggs heavily works against you here, since the air makes it rise and then sink.
Judge it by the middle. The edges will be set and the centre should still look distinctly underdone and slightly liquid when it comes out. It firms considerably over the next hour.

Gooey Brownie Pie
Ingredients
Equipment
Method
- Preheat oven to 350°F (175°C). Grease your pie dish or line with parchment.
- Mix dry ingredients

- In a bowl, whisk together flour, cocoa powder, and salt. Set aside.
- Combine wet ingredients
- In a large bowl, whisk melted butter with both sugars until smooth.
- Add eggs & vanilla
- Add eggs one at a time, mixing well after each. Stir in vanilla extract.
- Combine wet + dry
- Gradually fold dry ingredients into wet mixture. Do not overmix.
- Add chocolate chips
- Fold in chocolate chips or chunks evenly.

- Pour into pan
- Spread batter evenly into prepared pie dish.
- Bake
- Bake for 30–35 minutes.

- Edges should be set
- Center should still look slightly soft for gooey texture

- Cool slightly
- Let sit for 10–15 minutes before slicing.


Notes
- Don’t overbake—this is key for a gooey center
- Use good-quality chocolate for richer flavor
- Let it rest slightly so it slices cleanly
Where This One Goes Wrong
For the deepest chocolate flavor, bloom the cocoa powder briefly by whisking it into the warm melted butter before combining with the sugars. This technique intensifies the cocoa aroma and creates a smoother batter with fewer dry pockets. During testing, this single adjustment gave the brownie pie a noticeably richer finish compared to adding cocoa directly with the flour.
Avoid using a glass pie dish if possible. Metal pans conduct heat more evenly and help create crisp edges while keeping the center soft. Glass pans often continue baking the brownie pie after removal from the oven, which can dry out the middle faster than expected.
One of the easiest mistakes is waiting for the center to look completely firm before removing the pie from the oven. Unlike traditional cakes, this dessert should retain a slight wobble in the middle. If the entire surface looks fully set, the interior may lose its gooey texture after cooling.
Letting the batter rest for five minutes before baking also helps dissolve the sugars more evenly, contributing to the shiny crackled top. If you enjoy extra pockets of melted chocolate, reserve a small handful of chocolate chips and scatter them over the batter just before baking.
For storage, cover the brownie pie tightly and keep at room temperature for up to two days or refrigerate for four days. Reheating individual slices for about 10 seconds in the microwave restores the warm, molten texture without drying out the edges.
Why They Spread, and How to Stop It
Whether these come out thin and crisp or thick and chewy is decided mostly before baking, by butter temperature and by which sugar you use.
Butter is the main lever. Melted butter coats the flour and spreads freely, giving a flatter, denser result. Softened butter creamed with sugar traps air and holds more height. Cold butter cut in barely spreads at all. If a batch came out flatter than you wanted, the butter was warmer than the recipe assumed, and a warm kitchen is enough to cause it.
Chilling the dough does two separate things. Firm fat takes longer to melt in the oven, so there is less time to spread. And resting the dough lets the flour hydrate fully, which deepens the flavour noticeably. Thirty minutes helps; overnight is better, and the difference is real rather than superstition.
Sugar changes the outcome too. Brown sugar holds moisture and is slightly acidic, giving a softer, chewier, more spread-out result. White sugar gives crisper edges and a more even shape. Shifting the ratio between them adjusts the texture without touching anything else.
Finally, pull them early. Take them out when the edges are set and the centres still look slightly underdone. The tray holds a lot of heat and keeps cooking them for several minutes after it leaves the oven. Anything that looks properly done in the oven will be dry once it cools.
Changing the Texture
This brownie pie recipe works well with several flavor variations depending on the occasion. For a darker, more intense chocolate flavor, substitute bittersweet chocolate chunks for semi-sweet chips. A pinch of espresso powder added to the batter also deepens the cocoa notes without making the dessert taste like coffee.
During winter testing, we added toasted pecans and a drizzle of salted caramel over the warm pie, which created a richer dessert with a slight crunch against the fudgy center. For a lighter variation, fresh raspberries or sliced strawberries balance the richness and add a subtle tart contrast.
Gluten-free flour blends formulated for baking generally work well here, although the texture becomes slightly softer. Dairy-free butter substitutes can also be used successfully, though the edges may not crisp as much as traditional butter versions.
If serving for special occasions, try topping each slice with whipped cream, chocolate curls, or a scoop of coffee ice cream for a bakery-style presentation that pairs beautifully with the warm chocolate aroma.
Frequently Asked Questions
-
Q: Why did my brownie pie turn out dry?
The most common reason is overbaking. Remove the pie when the center still looks slightly soft because it continues setting as it cools. -
Q: Can I make brownie pie ahead of time?
Yes. The flavor actually deepens after several hours. Warm slices slightly before serving to bring back the soft, gooey texture. -
Q: What type of cocoa powder works best?
Unsweetened natural cocoa powder creates a classic brownie flavor, while Dutch-process cocoa gives a darker, smoother chocolate taste. -
Q: Can I freeze brownie pie?
Absolutely. Wrap slices tightly and freeze for up to two months. Thaw overnight in the refrigerator before reheating gently. -
Q: Why is my top not shiny and crackly?
A glossy top usually comes from properly dissolved sugar and well-whisked eggs. Mixing the wet ingredients thoroughly before adding flour helps create that signature crust. -
Q: Can I use milk chocolate chips instead of semi-sweet?
You can, but the pie will taste noticeably sweeter. Semi-sweet or bittersweet chocolate keeps the flavor more balanced and less sugary.