Best Red Velvet Oreo Swiss Roll Cake – Easy Creamy Filling
Learn how to make a soft Red Velvet Oreo Swiss Roll Cake with creamy Oreo filling. Easy step-by-step recipe perfect for holidays and parties
📋 Table of Contents
Why You’ll Love This Recipe
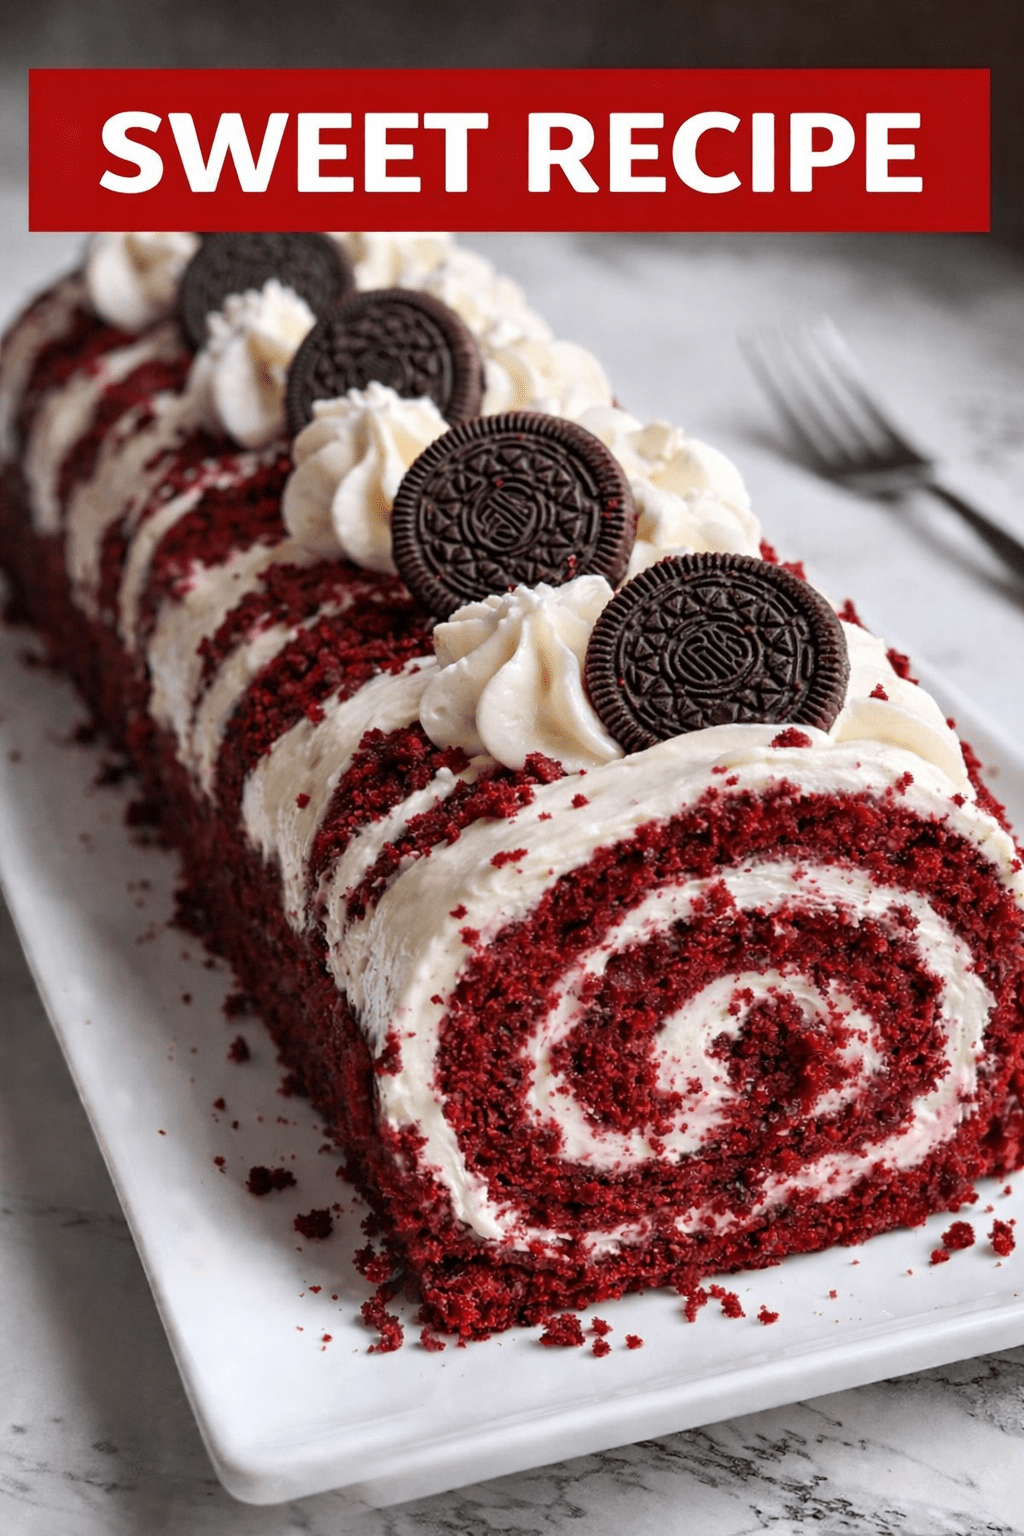
This Red Velvet Oreo Swiss Roll Cake is one of those desserts that looks delicate on the outside but surprises you with its rich, creamy center. When I first tested it in the kitchen, the biggest challenge wasn’t the flavor—it was the roll. The sponge is extremely soft and airy, almost like a warm cloud, and that means timing is everything. If you let it cool too much before rolling, it will crack. I learned this the hard way on my second test batch when the cake split right down the middle. The fix is simple but crucial: always roll it while it’s still warm, wrapped in a slightly damp towel. That trapped steam keeps the sponge flexible and prevents breakage.
The texture is what makes this cake memorable. The red velvet sponge is light, slightly cocoa-rich, and tender enough to melt on the tongue. The aroma while baking is subtle chocolate with a faint tang from vinegar, which actually sharpens the flavor instead of making it acidic. Once filled, the Oreo cream adds a contrast that is both creamy and slightly crunchy, with those cookie crumbs giving little bursts of chocolate intensity in every bite.
From a technical perspective, beating the eggs and sugar long enough is essential. That step builds the structure that replaces heavy flour ratios, giving you an elastic sponge that can bend without breaking. The whipped cream folded into the cream cheese is equally important—it lightens the filling so it doesn’t press down and squeeze out when you roll the cake.
If your sponge ever turns dense, it usually means the batter was overmixed after adding flour. I’ve seen this happen when rushing: the gluten develops too much, and instead of a flexible roll, you get a stiff sheet cake. The solution is gentle folding with a spatula, not a whisk, and stopping the moment no dry streaks remain. When done right, the final roll has a soft bounce when pressed, a creamy center, and a balanced sweetness that doesn’t feel heavy even after a full slice.
Red Velvet Oreo Swiss Roll Cake
Ingredients
Equipment
Method
- Prepare the Pan
- Preheat the oven to 350°F (175°C).
- Line a 10×15-inch (25×38 cm) jelly roll pan with parchment paper and lightly grease it.
- Make the Batter
- Beat the eggs and sugar together for 4–5 minutes until pale and fluffy.
- Add the vanilla extract, oil, milk, vinegar, and red food coloring. Mix until combined.
- In a separate bowl, sift together the flour, cocoa powder, baking powder, and salt.
- Gently fold the dry ingredients into the wet mixture until smooth. Do not overmix.
- Bake
- Spread the batter evenly in the prepared pan.
- Bake for 12–15 minutes, or until the top springs back lightly when touched.
- Do not overbake, as this can cause cracking.
- Roll While Warm
- Place a clean kitchen towel on a flat surface and lightly dust it with powdered sugar.
- Turn the warm cake out onto the towel and carefully peel off the parchment paper.
- Starting from the short side, roll the cake up with the towel inside.
- Allow it to cool completely, about 30–45 minutes.
- Prepare the Filling
- Beat the cream cheese until smooth.
- Add powdered sugar and vanilla extract and mix well.
- In a separate bowl, whip the cold heavy cream until stiff peaks form.
- Fold the whipped cream gently into the cream cheese mixture.
- Fold in the crushed Oreo cookies.
- Assemble
- Carefully unroll the cooled cake.
- Spread the Oreo cream filling evenly over the surface.
- Roll the cake back up tightly without the towel.
- Wrap in plastic wrap and refrigerate for at least 1 hour before slicing.
- Decorate and Serve
- Dust with powdered sugar, sprinkle with crushed Oreos, or drizzle with melted white chocolate if desired.
- Slice with a serrated knife for clean cuts and serve chilled.
- Storage
- Refrigerate for up to 3 days in an airtight container.
- Freeze tightly wrapped for up to 1 month.
Notes
- Roll the cake while it is still warm to prevent cracking.
- Do not overbake. A dry sponge will crack when rolled.
- Use room temperature eggs for better volume and a lighter texture.
- Whip the heavy cream until stiff peaks form, but do not overwhip.
- Chill the cake for at least 1 hour before slicing for clean, sharp cuts.
- For cleaner slices, wipe the knife between each cut.
- You can substitute the Oreo cookies with chocolate sandwich cookies of your choice.
Expert Tips & Techniques
The most critical stage in this recipe is the sponge handling. After baking, the cake should be inverted immediately onto parchment dusted with powdered sugar. If you wait too long, steam escapes unevenly and creates dry edges that crack during rolling. I also recommend checking doneness at the 12-minute mark—overbaking by even 2–3 minutes makes the sponge brittle. Another detail professionals never skip is stabilizing the whipped cream. If your kitchen is warm, place the bowl over ice while whipping; this keeps the fat structure firm and prevents the filling from collapsing when sliced. Store the rolled cake wrapped tightly for at least one hour so the cream sets and the spiral shape locks in.
Variations & Alternatives
You can replace Oreos with chocolate hazelnut cookies for a deeper, nutty profile or use raspberry crumbs for a tangy contrast against the cocoa sponge. For a lighter version, swap half the cream cheese with Greek yogurt, which adds a subtle tang and reduces richness. A white chocolate drizzle on top also enhances sweetness without overpowering the red velvet base.
Frequently Asked Questions
- Why did my Swiss roll crack? The sponge was likely overbaked or cooled before rolling. Always roll while warm.
- Can I make it ahead of time? Yes, it actually improves after chilling overnight as the flavors meld.
- Why is my filling runny? The cream was under-whipped or too warm. Chill both bowl and cream before whipping.
- Can I skip food coloring? Yes, but the color will be more cocoa-brown than red velvet classic style.
")
")
")
")
