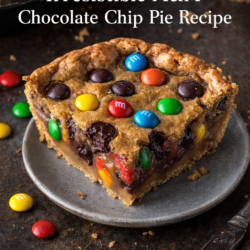
The Best Double Chocolate Chip Cookies (Bakery-Style)
These Cookies are soft and fudgy double chocolate chip cookies with gooey centers and rich cocoa flavor. They are bakery-style cookies ready in under 30 minutes.
📋 Table of Contents
Why You’ll Love This Recipe
Cocoa powder changes a cookie dough in a way that is easy to miss. It replaces flour but does not behave like flour: it has almost no gluten-forming protein and it absorbs more liquid. A dough made with a straight swap comes out drier and more crumbly than expected.
That is why chocolate cookie recipes often carry more fat or an extra egg yolk than their plain equivalents. It compensates for what the cocoa takes.
Chilling matters here too, and for two reasons. Firm fat spreads less in the oven, and resting the dough lets the cocoa hydrate fully, which deepens the flavour noticeably. Thirty minutes helps; overnight is better.
Judging doneness by colour does not work with a dark dough. Go by the edges instead: they should be set while the centres still look soft and slightly underdone. The tray keeps cooking them for several minutes after it leaves the oven.

Best Double Chocolate Chip Cookies Ever
Ingredients
Equipment
Method
- Preheat oven to 350°F (175°C). Line a baking sheet with parchment paper.
- Mix dry ingredients:
- In a bowl, whisk together flour, cocoa powder, baking soda, baking powder, and salt. Set aside.
- Cream butter & sugars:
- In a large bowl, beat butter, brown sugar, and granulated sugar until light and fluffy (about 2–3 minutes).
- Add eggs & vanilla:
- Mix in eggs one at a time, then add vanilla extract.
- Combine:
- Gradually add dry ingredients into wet ingredients. Mix until just combined (do not overmix).
- Fold in chocolate:
- Stir in chocolate chips and chunks evenly.
- Chill dough (important):
- Refrigerate dough for at least 30 minutes for thicker cookies.
- Scoop & bake:
- Scoop 2 tablespoons of dough per cookie. Place 2 inches apart.
- Bake for 10–12 minutes until edges are set but centers look slightly soft.
- Cool:
- Let cookies rest on baking sheet for 5 minutes before transferring to a wire rack.
Notes
- For extra thick cookies, chill the dough for 1 hour instead of 30 minutes.
- If you prefer sweeter cookies, use milk chocolate chips instead of semi-sweet.
- For a deeper chocolate flavor, add 1 teaspoon espresso powder to the dry ingredients.
- Do not overbake — cookies will continue cooking on the baking sheet after removal.
- Room temperature eggs and butter ensure better texture and even mixing.
- To make cookies uniform in size, use a 2-tablespoon cookie scoop.
- Sprinkle flaky sea salt on top before baking for a gourmet finish.
Controlling Spread and Chew
Whether these come out thin and crisp or thick and chewy is decided mostly before baking, by butter temperature and by which sugar you use.
Butter is the main lever. Melted butter coats the flour and spreads freely, giving a flatter, denser result. Softened butter creamed with sugar traps air and holds more height. Cold butter cut in barely spreads at all. If a batch came out flatter than you wanted, the butter was warmer than the recipe assumed, and a warm kitchen is enough to cause it.
Chilling the dough does two separate things. Firm fat takes longer to melt in the oven, so there is less time to spread. And resting the dough lets the flour hydrate fully, which deepens the flavour noticeably. Thirty minutes helps; overnight is better, and the difference is real rather than superstition.
Sugar changes the outcome too. Brown sugar holds moisture and is slightly acidic, giving a softer, chewier, more spread-out result. White sugar gives crisper edges and a more even shape. Shifting the ratio between them adjusts the texture without touching anything else.
Finally, pull them early. Take them out when the edges are set and the centres still look slightly underdone. The tray holds a lot of heat and keeps cooking them for several minutes after it leaves the oven. Anything that looks properly done in the oven will be dry once it cools.
What to Watch For
Chill Time Is Non-Negotiable. I once skipped the 30-minute rest because I wanted cookies immediately. The result was a baking sheet of flat, greasy puddles. Chilling solidifies the butter, which means the cookies hold their shape and bake up thick. For the best texture, chill for 1 hour. You can even refrigerate the dough overnight, the flavor actually gets deeper.
Measure Cocoa Powder Correctly. Cocoa powder compresses easily. Spoon it into your measuring cup, then level with a knife. If you scoop directly with the cup, you’ll add 20-30% more cocoa than intended, which makes the dough dry and crumbly. I made this mistake for my first three test batches and couldn’t figure out why the dough wouldn’t come together.
Use a Cookie Scoop for Uniform Baking. A 2-tablespoon scoop ensures every cookie is the same size, so they bake evenly. No scoop? Roll the dough into 1.5-inch balls. Uneven sizes mean some cookies burn while others stay raw in the middle.
Let Them Rest on the Baking Sheet. This is the most common mistake home bakers make. The cookies need 5 full minutes on the hot sheet after coming out of the oven. During that time, residual heat continues cooking the centers without burning the edges. If you transfer them immediately, the gooey center will collapse and stick to the rack.
Storage for Freshness. Store baked cookies in an airtight container at room temperature for up to 5 days. To revive day-old cookies, microwave for 8-10 seconds, they’ll taste freshly baked. Unbaked dough keeps in the fridge for 3 days or in the freezer for 3 months. Freeze pre-scooped dough balls on a tray, then transfer to a bag. Bake frozen dough straight from the freezer, adding 2 minutes to the bake time.
Mix-Ins and Swaps
Peppermint Chocolate Cookies: Add ½ teaspoon peppermint extract along with the vanilla. Fold in ½ cup crushed candy canes after mixing. The cool mint against dark chocolate is a holiday classic.
Spiced Mexican Chocolate: Add 1 teaspoon ground cinnamon, ¼ teaspoon cayenne pepper, and ¼ teaspoon chili powder to the dry ingredients. The heat builds slowly after the chocolate sweetness, unexpected but addictive.
Gluten-Free Adaptation: Substitute the all-purpose flour with a 1:1 gluten-free baking blend that contains xanthan gum (King Arthur or Bob’s Red Mill work best). Do not overmix. Add 2 tablespoons of milk if the dough feels too stiff. Chill for 1 hour minimum. Gluten-free dough is stickier and needs extra cold time.
White Chocolate & Raspberry: Replace the semi-sweet chips with white chocolate chips and fold in ½ cup of freeze-dried raspberries (crushed slightly). The tart raspberry cuts through the white chocolate’s sweetness, and the freeze-dried fruit won’t add moisture like fresh berries would.
Lower Sugar Option: Reduce granulated sugar to ¼ cup and use dark chocolate chips (70% cacao or higher). The cookies will be less sweet but more intensely chocolate. Do not reduce brown sugar, as it provides structure and moisture.
Frequently Asked Questions
- Q: Why are my cookies cakey instead of fudgy? You either used too much flour or overmixed the dough. Spoon and level your flour, and mix just until the dry ingredients disappear. No more than 10-15 seconds after adding flour.
- Q: Can I use Dutch-process cocoa instead of natural cocoa? Yes, but the cookies will be darker and less sweet. Natural cocoa (like Hershey’s) is slightly acidic and works better with baking soda. If using Dutch-process, add ¼ teaspoon cream of tartar to activate the baking soda properly.
- Q: My dough is too sticky to scoop, what went wrong? The dough likely isn’t cold enough. Return it to the refrigerator for 20 more minutes. If it’s still sticky, your butter may have been too soft when you started. Next time, beat the butter just until creamy. Not until it’s greasy or shiny.
- Q: Can I make these without eggs? Yes, substitute each egg with ¼ cup of unsweetened applesauce or a commercial egg replacer. The texture will be slightly denser, and the cookies may spread more. Chill the dough for an extra 30 minutes to compensate.
- Q: Why do my cookies look puffy and pale after baking? You underbaked them. The edges should look set and slightly darker than the center. If the entire cookie is pale and domed, bake for 2 more minutes. If the edges are brown but centers are raw, your oven runs hot. Lower temperature by 25°F next time.
- Q: How many cookies does this recipe make? Using a 2-tablespoon scoop, this recipe yields 24 to 30 cookies, depending on how generous you are with the scoop. For giant bakery-style cookies (¼ cup dough per cookie), you’ll get 14 to 16 cookies, and you’ll need to add 3-4 minutes to the bake time.